 Commonwealth Consolidated Regulations Commonwealth Consolidated Regulations
Note: See the definition of no - anchoring area in subsection 5(1).
Part 1 -- Orpheus and Magnetic Islands
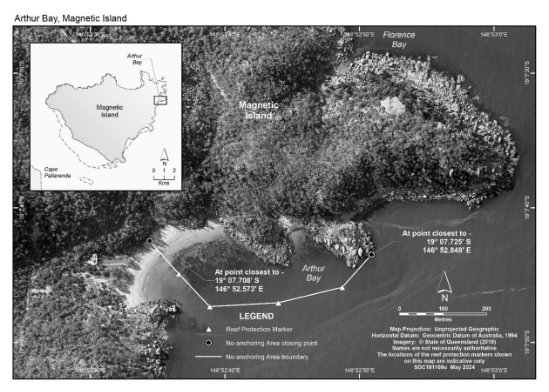
The following map shows the no - anchoring area at Arthur Bay, Magnetic Island.
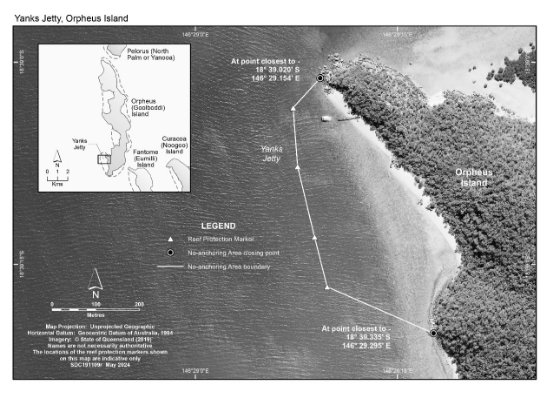
The following map shows the no - anchoring area at Yanks Jetty, Orpheus Island.
The following map shows the no - anchoring area at Horseshoe Bay, Bowen.

Part 3 -- Whitsunday Planning Area
The following map shows the no - anchoring area at Bait Reef in the Whitsunday Planning Area.

The following map shows the no - anchoring area at Black Island in the Whitsunday Planning Area.

6 Daydream Island--Sunlover's Bay
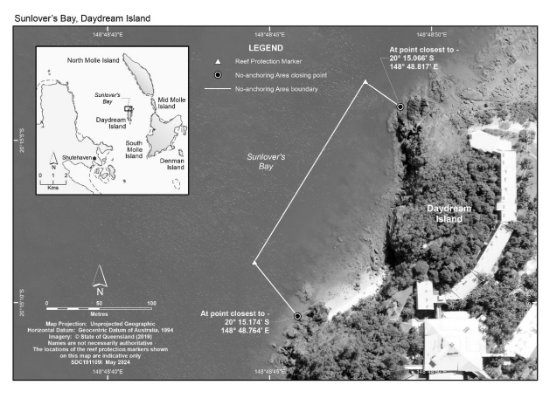
The following map shows the no - anchoring area at Sunlover's Bay, Daydream Island, in the Whitsunday Planning Area.
The following map shows the no - anchoring area at Dumbell Island in the Whitsunday Planning Area.

8 Haslewood Island--Chalkies Beach
The following map shows the no - anchoring area at Chalkies Beach, Haslewood Island, in the Whitsunday Planning Area.

9 Hayman Island--Blue Pearl Bay
The following map shows the no - anchoring area at Blue Pearl Bay, Hayman Island, in the Whitsunday Planning Area.

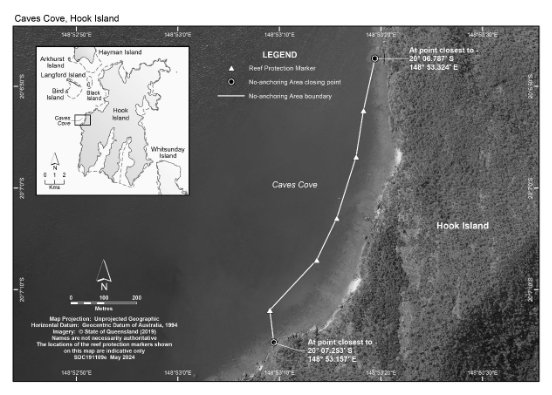
The following map shows the no - anchoring area at Caves Cove, Hook Island, in the Whitsunday Planning Area.
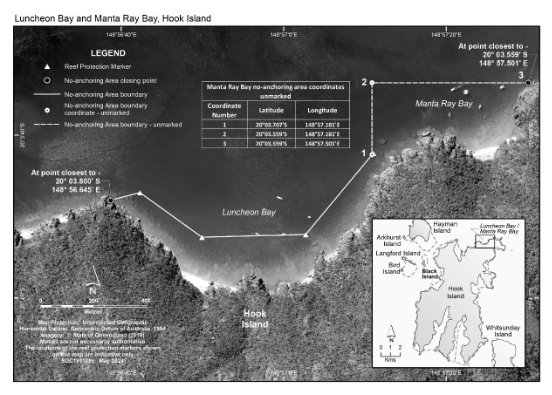
11 Hook Island--Luncheon Bay and Manta Ray Bay
The following map shows the no - anchoring area at Luncheon Bay and Manta Ray Bay, Hook Island, in the Whitsunday Planning Area.
The following map shows the no - anchoring area at Langford Island in the Whitsunday Planning Area.

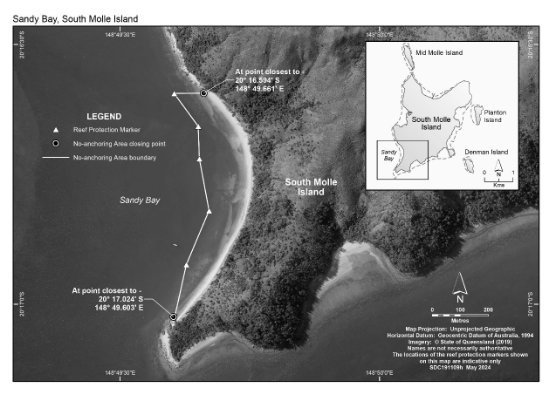
13 South Molle Island--Sandy Bay
The following map shows the no - anchoring area at Sandy Bay, South Molle Island, in the Whitsunday Planning Area.
14 Whitsunday Island--Cairn Beach
The following map shows the no - anchoring area at Cairn Beach, Whitsunday Island, in the Whitsunday Planning Area.
